Let’s Get Started!
In the next 5 minutes, you’ll create your first AI tool. No coding required - just a few clicks and you’re ready to go.Step 1: Sign Up
Head to sip.launchlemonade.app and create your free account.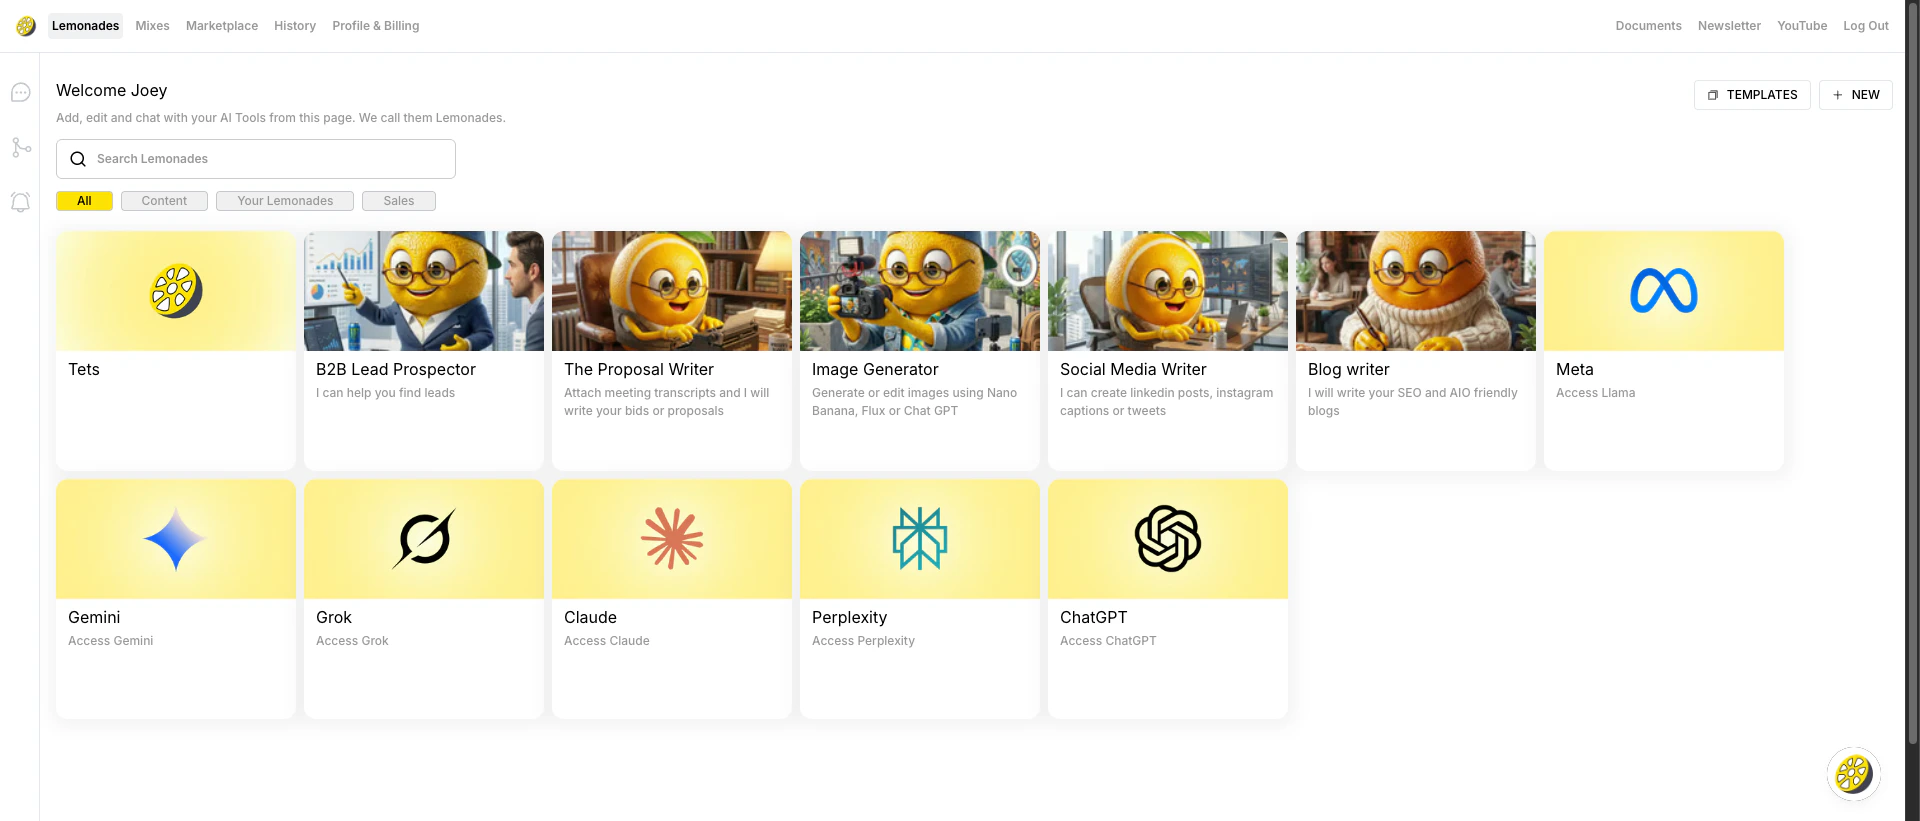
Step 2: Create Your First Lemonade
Once on the dashboard, click the ”+ NEW” button in the top right corner.
- Give your Lemonade a name (e.g., “Meal Advisor”, “Coaching CoPilot”, “AI CFO”)
- Select the type of Lemonade
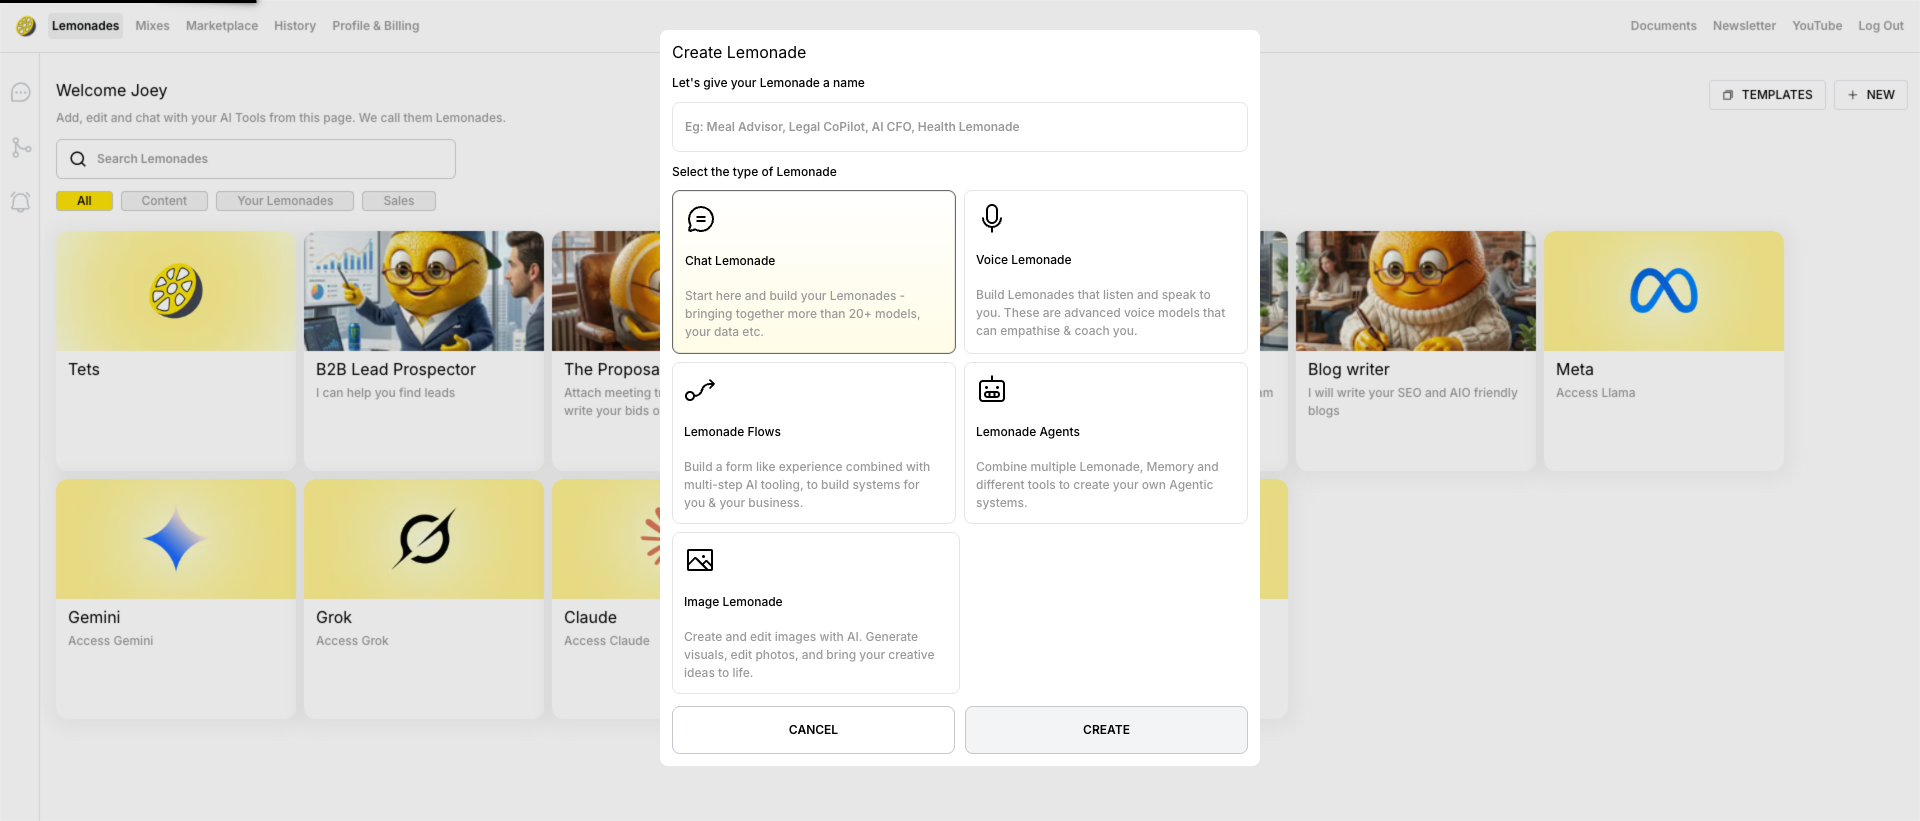
Lemonade Types
Don’t worry about choosing the “perfect” type - you can always create more Lemonades later. For your first one, we recommend Chat Lemonade.| Type | Description | Best For |
|---|---|---|
| Chat Lemonade | Start here! Build AI assistants with 20+ models and your data | Chatbots, assistants, Q&A |
| Voice Lemonade | AI that listens and speaks to you with empathetic voice models | Voice assistants, coaching |
| Lemonade Flows | Multi-step AI workflows with form-like experiences | Lead capture, surveys, processes |
| Lemonade Agents | Combine multiple Lemonades, Memory, and tools for agentic systems | Complex automation |
| Image Lemonade | Generate and edit images with AI | Visual content creation |
Step 3: Configure Your Lemonade
After creating, you’ll enter the Lemonade Editor with 7 tabs: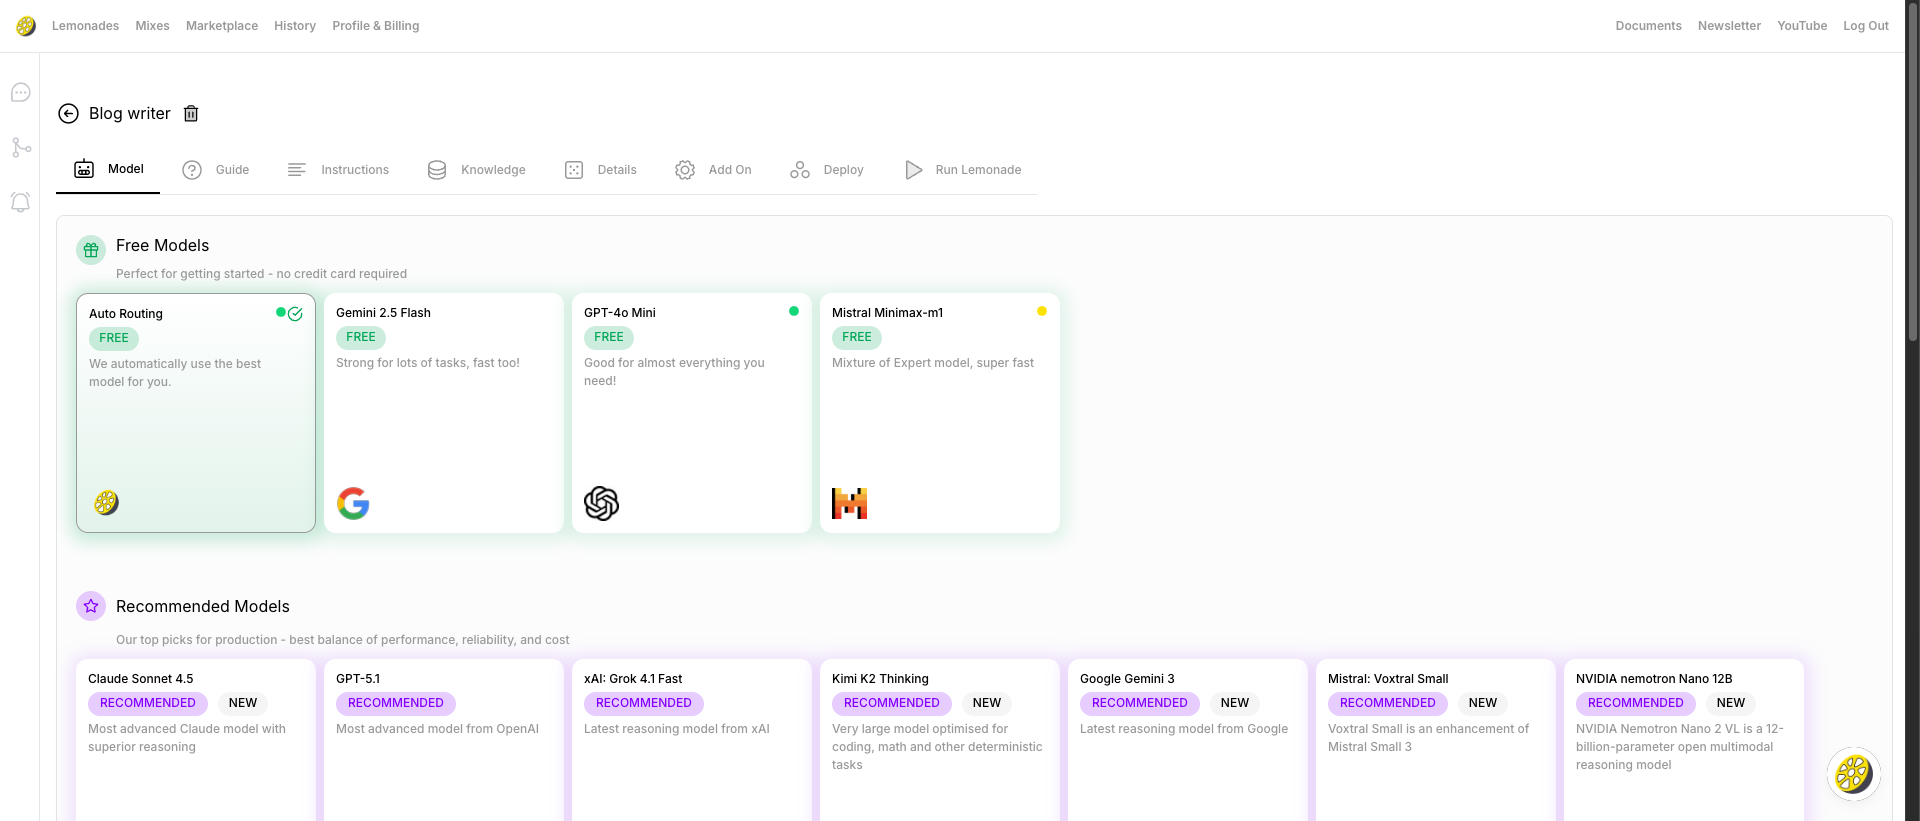
Model Tab
Choose your AI model. We offer: Free Models (no credit card required):- Auto Routing – We automatically select the best model for you
- Gemini 2.5 Flash – by Google - Strong for lots of tasks, fast too!
- GPT-4o Mini – by OpenAI - Solid all rounder, the one who started this all
- Minimax-m1 – by Mistral - Mixture of Expert model, super fast
- Claude Sonnet/Opus – by Anthropic - Advanced Claude model with superior reasoning
- GPT – by OpenAI - Broad capability, strong with structured outputs
- Kimi K2 Thinking – by MoonshotAI - Optimised for coding, math, and deterministic tasks
- Gemini – by Google - Large context windows, strong all rounder
Guide Tab
A helpful checklist showing what your Lemonade needs: Mandatory (3 items):- ✅ Connected to a Model
- ✅ Has an Instruction
- ✅ Has a Welcome message
- Add files to enhance knowledge
- Add website or links to fine tune
Instructions Tab
Configure how your Lemonade behaves:- Welcome Message – The first message sent to users. Use
{first_name}to personalize!- Example: “Hello , how can I help you today?”
- Instructions – This is where you tell your AI who it is and how to behave. Think of it like giving a new employee their job description.
- Example: “You are a helpful customer support assistant for [Company Name]…”
Knowledge Tab
Train your Lemonade with your own data:- Add Files – Upload PDFs, documents, spreadsheets to teach your Lemonade
- Add Websites – Crawl and learn from any website
- Integrations:
- Notion – Connect your Notion workspace
- Google Drive – Connect your Drive files
Details Tab
Customize your Lemonade:- Lemonade Name – Give it a memorable name
- Brain – Select which Brain (memory context) to use
- Lemonade Description – Describe what it does (useful for selling)
- Lemonade Style – Choose a visual style/avatar
Add On Tab
Enable powerful features:| Feature | Description | Default |
|---|---|---|
| Enable Search | Let your Lemonade search the internet | Off |
| Enable File Upload | Users can upload files during chat | On |
| Enable Image Upload | Users can share images for analysis | On |
| Remember All Conversations | Lemonade remembers chat history | Off |
| Developer Mode | Connect via API or Zapier | Off |
Deploy Tab
Put your Lemonade to work:-
Email Assistant – Email your Lemonade directly from your inbox
- Get a custom @ai.launchlemonade.app email address
- Save to Gmail or Outlook with one click
-
Website Chatbot – Embed on your website (contact us)
- Click “CREATE EMBED MIX” to get started
-
Monetise – Sell your Lemonade on your domain (contact us)
- Click “CREATE SUBSCRIPTION MIX”
Step 4: Test Your Lemonade
You did it! Click “Run Lemonade” in the top right to start chatting with your brand new AI. Try asking it a question and watch it respond using your instructions.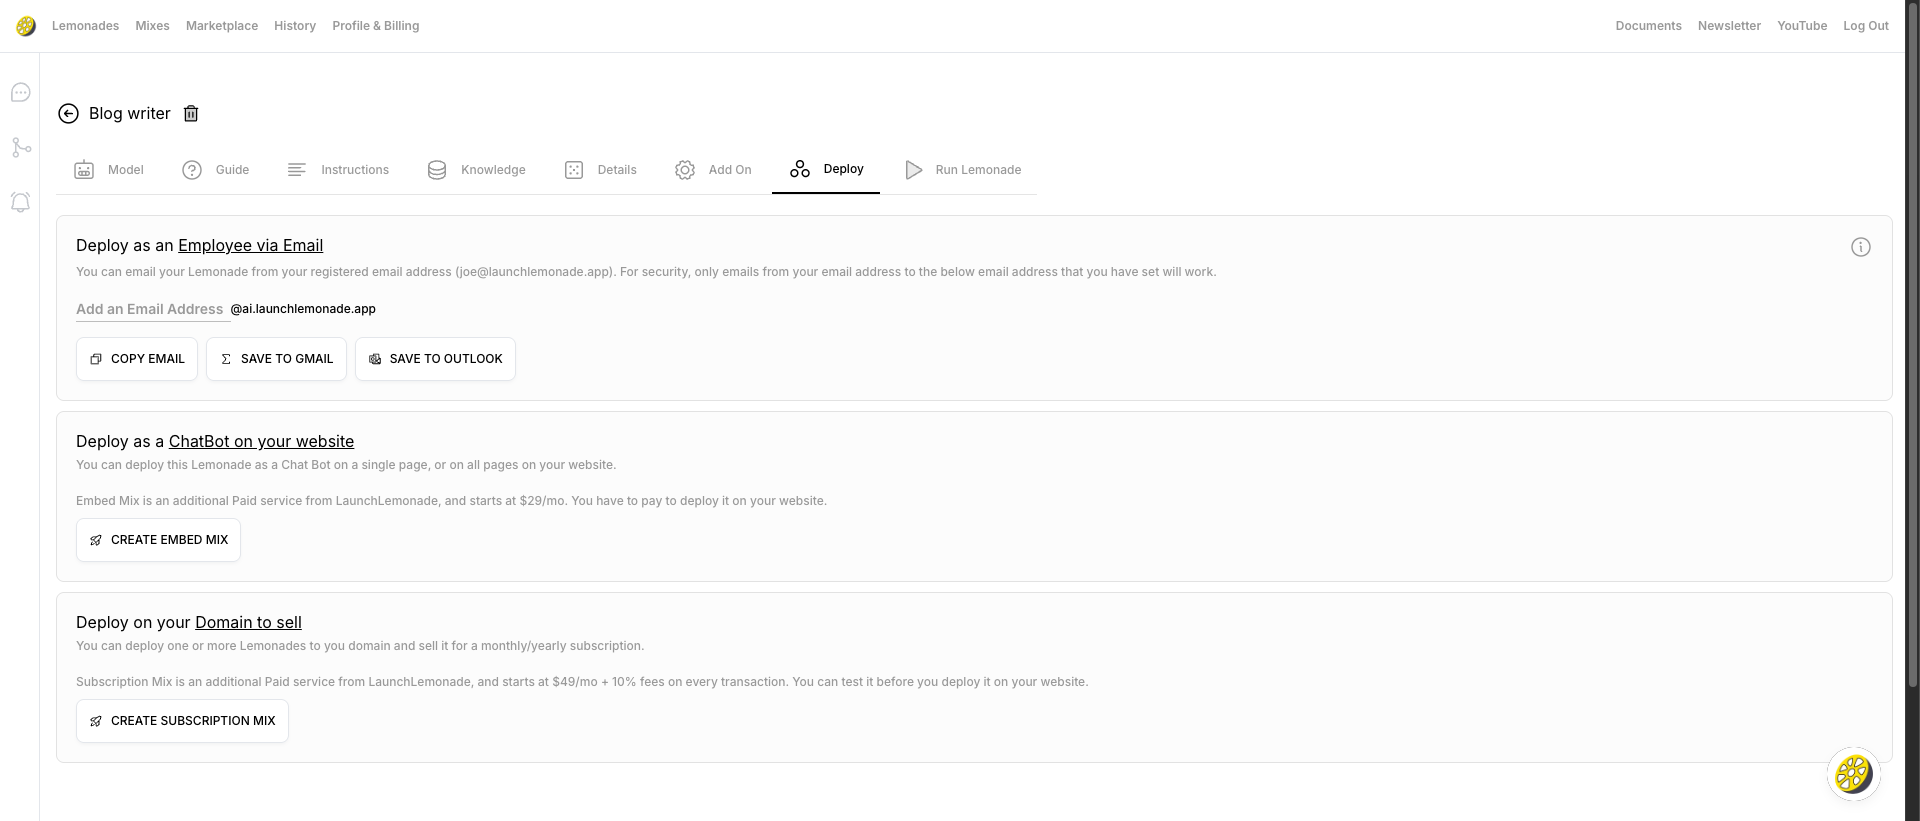
Step 5: Share & Deploy
Once you’re happy with your Lemonade:- Use the Deploy tab to set up email, embed, or subscription options
- Create a Mix to package and brand your Lemonade for deployment
Next Steps
Recommended next: Set up your Brain to give your Lemonade persistent memory. Then explore the other options when you’re ready.Set Up Brain/Memory
Configure persistent memory for your Lemonades
Build Knowledge
Learn how to train your Lemonade with files and websites
Create Mixes
Package and whitelabel your Lemonades
Explore Templates
Start from ready-made templates